Quantcast
Channel: Free Alkaline Diet Recipes – Live Energized
Viewing all 84 articles
Browse latest View live

Alkaline Recipe #205: Gluten-Free Buckwheat & Pumpkin Pancakes

$
0
0

This is a great warming, filling, simple breakfast that really feels like a treat!

Packed with potassium, and anti-inflammatories, it’s supportive of the kidneys while also giving a decent punch of fibre and protein too.

This is a great one for a weekend treat, while still being alkaline and healthy and with zero gluten, fructose, processed foods or acid-forming foods.
 

Gluten-Free Buckwheat & Pumpkin Pancakes
Write a review
Print
Prep Time
25 min
Cook Time
10 min
Total Time
35 min
Prep Time
25 min
Cook Time
10 min
Total Time
35 min
Ingredients
  1. 1 1/2 cups buckwheat flour
  2. 1 teaspoon baking powder
  3. 1/2 teaspoon sea salt
  4. ½ teaspoon ginger
  5. ¼ teaspoon allspice
  6. ¼ teaspoon nutmeg
  7. ½ teaspoon cinnamon
  8. ½ medium sized pumpkin or butternut squash
  9. 2 tablespoons ground flax seeds
  10. 2 tablespoons brown rice syrup/rice malt syrup
  11. 2 cups almond milk
  12. 2 tbsp coconut oil
Instructions
  1. Start by making the pumpkin puree: peel and chop the pumpkin into 3/4 in chunks and steam for 15 minutes until soft, and then blend until smooth with a little coconut oil.
  2. Combine the flour, baking powder, salt and spices in a large bowl and set aside.
  3. Now combine the pumpkin, flax, rice malt syrup and almond milk in a small bowl and whisk until smooth.
  4. Pour the dry ingredients into the wet, and whisk further until well combined. Let the batter stand for ten minutes.
  5. Set a large pan over medium-low heat; coat it generously with coconut oil
  6. Once it has reached a reasonably hot temperature (i.e. not cold) and spoon a large spoon of the batter into the pan.
  7. Cook until bubbles start to form, then flip and cook on the other side until brown.
  8. Repeat with the remaining batter, adding more coconut oil or butter for each batch.
  9. Serve immediately with coconut yoghurt, fruit or the topping of your choice!
Notes
  1. Optional other toppings include chopped nuts & seeds, lemon & orange juice (freshly squeezed), rice malt syrup/brown rice syrup
Live Energized http://liveenergized.com/
Enjoy and let me know your topping variations!
Ross

P.S. Take a look at the Alkaline Recipe System. With hundreds of easy-to-prepare Alkaline recipes PLUS 7 goal-based meal plans each with itemized shopping lists (for goals including weight loss, more energy, better digestion, clearer skin and more) – it makes reaching your health goals SO easy!

+ Make sure to sign up for our free newsletter to get our latest alkaline recipes delivered weekly (it’s free).

The post Alkaline Recipe #205: Gluten-Free Buckwheat & Pumpkin Pancakes appeared first on Live Energized.


Alkaline Recipe #206: “Cheesy” Pumpkin Broccoli Soup

$
0
0

Pumpkin is such a wonderful base for so many meals, especially during the colder months. Comforting, thick and creamy, a delicious and easy way to get in lots of alkalizing nutrients thanks to broccoli, celery, and almonds. I topped mine with some gluten-free bread croutons, smoked paprika and parsley.

The Recipe: “Cheesy” Pumpkin Broccoli Soup

Serves: 4 (generous portions)

Preparation time: 35 mins

Ingredients

1 tbsp coconut oil

1 medium onion, chopped

2 garlic cloves, minced

1 cup chopped celery

4 cups broccoli florets

3 cups chopped pumpkin (I used butternut)

4 cups vegetable broth

2 cups almond milk or other plant-based milk of your choice (you can add more or less depending on the thickness you prefer)

1/4 tsp cayenne pepper or flakes, optional

1/2 tbsp lemon juice

Pink salt & black pepper, to taste

1/4 cup fresh chopped parsley and some for garnish

Smoked paprika as a garnish, optional

Instructions

Melt the oil and cook the chopped onion until translucent, about 5 – 6 minutes, add the garlic and cook for 1 more minute. Add celery and pumpkin, broth, nutritional yeast, cayenne and simmer until almost soft, about 10 – 12 minutes. I always add the broccoli later so I limit the cooking time, add it now and cook 5 more minutes.

Transfer the soup to the blender – divide in a few batches, add almond milk and blend until smooth or a bit chunky, how you like it. You can reheat the soup if you wish.

Stir in lemon juice, pink salt, and black pepper if needed, the chopped parsley and top it with some more parsley and smoked paprika.

I made some croutons from some older gluten-free bread. To make these I cut the bread into cubes, baked it in a little olive oil and sprinkled it with garlic powder.


"Cheesy" Pumpkin & Broccoli Soup
Serves 4
Comforting, thick and creamy, a delicious and easy way to get in lots of alkalizing nutrients thanks to broccoli, celery and almonds.
Write a review
Print
Prep Time
10 min
Cook Time
25 min
Total Time
35 min
Prep Time
10 min
Cook Time
25 min
Total Time
35 min
Ingredients
  1. 1 tbsp coconut oil
  2. 1 medium onion, chopped
  3. 2 garlic cloves, minced
  4. 1 cup chopped celery
  5. 4 cups broccoli florets
  6. 3 cups chopped pumpkin (I used butternut)
  7. 4 cups vegetable broth
  8. 2 cups almond milk or other plant-based milk of your choice (you can add more or less depending on the thickness you prefer)
  9. 4 tbsp nutritional yeast
  10. 1/4 tsp cayenne pepper or flakes, optional
  11. 1/2 tbsp lemon juice
  12. Pink salt & black pepper, to taste
  13. 1/4 cup fresh chopped parsley and some for garnish
  14. Smoked paprika as a garnish, optional
Instructions
  1. Melt the oil and cook the chopped onion until translucent, about 5 - 6 minutes, add the garlic and cook for 1 more minute. Add celery and pumpkin, broth, nutritional yeast, cayenne and simmer until almost soft, about 10 - 12 minutes. I always add the broccoli later so I limit the cooking time, add it now and cook 5 more minutes.
  2. Transfer the soup to the blender - divided in a few batches, add almond milk and blend until smooth or a bit chunky, how you like it. You can reheat the soup if you wish.
  3. Stir in lemon juice, pink salt and black pepper if needed, the chopped parsley and top it with some more parsley and smoked paprika.
Notes
  1. I made some croutons from some older gluten-free bread. To make these I cut the bread into cubes, baked it in a little olive oil and sprinkled it with garlic powder.
Live Energized http://liveenergized.com/

I hope you enjoyed this guest post from alkaline blogger, and Live Energized friend, Tina Redder. Learn more about Tina and her alkaline lifestyle on her website. You can also follow her on Instagram @tinas_alkaline_diet

The post Alkaline Recipe #206: “Cheesy” Pumpkin Broccoli Soup appeared first on Live Energized.

Alkaline Recipe #195 Crunchy Kale Salad with Tahini Dressing

$
0
0

This salad is SO fast to make, so satisfying and it’s unbelievably alkaline. It’s become my #1 favourite alkaline lunch.

The crunchy kale and radish, the surprise of the texture of the nuts, the creaminess of the tahini dressing…

Oh man, I’m drooling just thinking about it!

It’s packed with alkalinity, packed with nutrients and is highly anti-inflammatory and anti-oxidant rich.

I love making it easy to get alkaline, get healthy, and get nourished and this salad is a real shortcut. The prep time of the whole thing is about 8 minutes yet it presents and tastes like a meal that’s had real care taken in it’s preparation!

If you’re in a hurry this is a great, filling salad.

OR you can use it as a fantastic starter or side salad.

In summary, it ROCKS.

kale crunchy salad close up

Crunchy Kale Salad with Tahini Dressing

Serves 2

Ingredients

4 big handfuls of kale, stalks removed and roughly sliced
8 brussels sprouts, shaved thin
2 radishes, thinly sliced
1 carrot, shredded or thinly sliced
1/2 cup of canellini beans (or any other beans you like!)
2 tablespoons of almonds, roughly chopped
1 tablespoon of cashews
1 tablespoon of pumpkin seeds
1 cup basil, chopped

For the Tahini Dressing

Half a large avocado
1 tbsp tahini
1 garlic clove
1 tbsp olive or flax oil
2 tbsp fresh lemon juice
Cracked black pepper
Pinch of Himalayan salt

Instructions

  1. This is so simple – first put all of the dressing ingredients except for the water into a blender or food processor and whizz until smooth. If you want to thin the consistency out a little, add a little water, a tablespoon at a time
  2. Now make the salad by mixing all of the salad ingredients together
  3. Pour over the dressing and stir well
  4. Serve!

As an option, you can add another step by mixing just the kale, sprouts, carrots and radishes with about a third of the dressing and then leaving to stand for 5-10 minutes to allow the kale to soften a little, then add the rest of the stuff and the rest of the dressing.

I just go for it in the shortest possible time as I like my kale a little crunchy – but whatever suits you best!

Ross

Crunchy Kale Salad with Tahini Dressing
Serves 2
Write a review
Print
Prep Time
8 min
Prep Time
8 min
Ingredients
  1. 4 big handfuls of kale, stalks removed and roughly sliced
  2. 8 brussels sprouts, shaved thin
  3. 2 radishes, thinly sliced
  4. 1 carrot, shredded or thinly sliced
  5. 1/2 cup of canellini beans (or any other beans you like!)
  6. 2 tablespoons of almonds, roughly chopped
  7. 1 tablespoon of cashews
  8. 1 tablespoon of pumpkin seeds
  9. 1 cup basil, chopped
  10. For the Tahini Dressing
  11. Half a large avocado
  12. 1 tbsp tahini
  13. 1 garlic clove
  14. 1 tbsp olive or flax oil
  15. 2 tbsp fresh lemon juice
  16. Cracked black pepper
  17. Pinch of Himalayan salt
Instructions
  1. This is so simple - first put all of the dressing ingredients except for the water into a blender or food processor and whizz until smooth. If you want to thin the consistency out a little, add a little water, a tablespoon at a time
  2. Now make the salad by mixing all of the salad ingredients together
  3. Pour over the dressing and stir well
  4. Serve!
Notes
  1. As an option, you can add another step by mixing just the kale, sprouts, carrots and radishes with about a third of the dressing and then leaving to stand for 5-10 minutes to allow the kale to soften a little, then add the rest of the stuff and the rest of the dressing.
  2. I just go for it in the shortest possible time as I like my kale a little crunchy - but whatever suits you best!
Live Energized https://liveenergized.com/

The post Alkaline Recipe #195 Crunchy Kale Salad with Tahini Dressing appeared first on Live Energized.

Simple Alkaline Breakfast (Alkaline Recipe #197)

$
0
0

The easiest, perfectly balanced alkaline breakfast recipe

Starting the day with a quality breakfast is not only important – it’s critical. Study after study has proven that a consistent breakfast:

  • Increases cognition
  • Mental performance and behaviour
  • Helps balance hormones
  • Increase metabolism
  • Mobilise unwanted visceral fat
  • Build muscle
  • Improves digestion…
  • And so much more!

And this is my most simple alkaline breakfast. It’s nutrient dense, alkaline, anti-inflammatory, antioxidant-rich and importantly – quick and easy to make!

I’m wondering why I didn’t share this one earlier! I must have thought I already had!

As you can see there are now 197 free alkaline recipes on this site, so I can be forgiven for forgetting one or two (not to mention the almost 200 recipes and meal plans in my Alkaline Recipe System).

[See Also: The Ultimate Alkaline Breakfast Recipes Guide]

Why This Is My Perfect, Simple Alkaline Breakfast

A brilliantly balanced breakfast will give you:

  1. Proper quantities of macro-nutrients: carbs, fats & protein
  2. Huge quantities of micronutrients: vitamins, minerals etc.
  3. A big hit of greens
  4. A feeling of fullness and satisfaction
  5. A source of steady, sustainable, enjoyable all-day energy
  6. TIME! It should be quick and easy!

And this simple breakfast recipe gives you all of that!

You get abundant quantities of healthy fats from the avocado and flax oil, a solid 25g protein from the quinoa, greens, nuts and seeds, 2-3 serves of green foods, a huge range of antioxidants from the greens, broccoli and tomato and of course it’s warming, filling, delicious and FAST!

This truly sets you up for an energized, engaged, focused, positive, alkaline day!

The Ultimate Simple Alkaline Breakfast

Simple Alkaline Breakfast Recipe Overhead

Serves 2
Ingredients

50g uncooked quinoa
1 big handful of spinach leaves
1 big handful of kale leaves (removed from stem)
12 cherry tomatoes or 2 large tomatoes
1/2 capsicum
1 handful of broccoli florets
1 avocado
Flax oil
Juice of 1/2 lemon
Himalayan salt
Black pepper

Optional: mixed nuts and seeds

Instructions

Start by getting the quinoa cooking. To do this, simply rinse it in a sieve under cold water and then add to a saucepan in the ratio of 1:1.5 (so approx half a cup of quinoa and 3/4 cup of water – BUT – I’d recommend cooking 1 cup of quinoa (and thus 1.5 cups of water) so you have some left over for later to put in a salad etc.).

Bring this to a boil and then turn down to the lowest simmer and cover. Leave this for 8-10 minutes but keep checking back. You know it is done when the quinoa gets their little curly tail and the water is gone.

Once it’s done, let it rest for another few minutes.

While the quinoa is cooking get the broccoli onto a super light steam just for 4-5 minutes so it’s still crunchy, but is giving the meal a little extra warmth.

Now slice up the avocado into cubes, thinly slice the spinach and kale, halve the cherry tomatoes, slice the capsicum and if you’re using nuts (such as almonds, cashews etc.) bash these with the flat side of a knife, or slice up roughly.

Once the quinoa and broccoli are done, simply put everything in a large bowl and drizzle with olive/flax oil and the lemon juice. Season and enjoy!

Nutrient Content Per Serve for the Simple Alkaline Breakfast

nutrition label for simple alkaline breakfast

Enjoy and if you have any questions please leave them below in the comments!

Ross

more alkaline foods

Simple Alkaline Breakfast
Serves 2
A perfectly balanced, simple alkaline breakfast including 25g protein and all of your daily vitamin C, A, K, manganese, magnesium and potassium plus an abundance of antioxidants, anti-inflammatory foods, healthy fats and of course alkalinity!
Write a review
Print
Prep Time
7 min
Cook Time
3 min
Total Time
10 min
Prep Time
7 min
Cook Time
3 min
Total Time
10 min
Ingredients
  1. 50g uncooked quinoa
  2. 1 big handful of spinach leaves
  3. 1 big handful of kale leaves (removed from stem)
  4. 12 cherry tomatoes or 2 large tomatoes
  5. 1/2 capsicum
  6. 1 handful of broccoli florets
  7. 1 avocado
  8. Flax oil
  9. Juice of 1/2 lemon
  10. Himalayan salt
  11. Black pepper
Instructions
  1. Start by getting the quinoa cooking. To do this, simply rinse it in a sieve under cold water and then add to a saucepan in the ratio of 1:1.5 (so approx half a cup of quinoa and 3/4 cup of water – BUT – I’d recommend cooking 1 cup of quinoa (and thus 1.5 cups of water) so you have some left over for later to put in a salad etc.).
  2. Bring this to a boil and then turn down to the lowest simmer and cover. Leave this for 8-10 minutes but keep checking back. You know it is done when the quinoa gets their little curly tail and the water is gone.
  3. Once it’s done, let it rest for another few minutes.
  4. While the quinoa is cooking get the broccoli onto a super light steam just for 4-5 minutes so it’s still crunchy, but is giving the meal a little extra warmth.
  5. Now slice up the avocado into cubes, thinly slice the spinach and kale, halve the cherry tomatoes, slice the capsicum and if you’re using nuts (such as almonds, cashews etc.) bash these with the flat side of a knife, or slice up roughly.
  6. Once the quinoa and broccoli are done, simply put everything in a large bowl and drizzle with olive/flax oil and the lemon juice. Season and enjoy!
Notes
  1. Optional ingredients are to top with chopped/smashed up nuts and seeds. If you find the taste of flax too much to begin with use half olive oil and half flax.
Live Energized https://liveenergized.com/

The post Simple Alkaline Breakfast (Alkaline Recipe #197) appeared first on Live Energized.

3 Fast Alkaline Breakfasts To Make You Feel Refreshed And Ready To Take On The World

$
0
0

How great would it be leaving the house in the morning knowing you had already had the perfect balance of nutrients your body needs?

To know you had set your day up to be a huge win, after only 5 minutes spent in the kitchen (we all know how busy mornings can be)…?

Having the RIGHT breakfast makes an incredible difference to you energy, cravings and performance throughout the whole day.

And the food decisions you make within that first hour of waking are crucial.

Get it wrong and your hormones and blood sugar, your metabolism and energy levels, your digestion and brain performance – these all get stuffed and face a huge uphill battle to recover.

But get it right and the day is effortless.

As always, my whole approach to the alkaline diet and getting you to your health goals is simple: just give your body the tools it needs to thrive and it will repay you tenfold.

What Makes the Perfect Breakfast

Upon waking, your body starts the day’s cycle – your blood sugar levels and insulin levels, cortisol levels, metabolism, the balancing of the melatonin that ends the sleep cycle and prepares the next…these all run on cycles, starting with you waking – and most importantly WHAT you eat for breakfast and WHEN you eat it…

To properly nourish the body and get it set up for success your breakfast should try to follow at least these rules while eliminating the foods below:

  1. Eat within 60 minutes (preferably 30 minutes) of waking
  2. Include protein – at least 7-8g
  3. Include fibre, any kind is fine – soluble, insoluble and resistant starch – a mix is best
  4. Healthy fats – this is critical: coconut oil, omega 3, and a combination from olive oil, avocado, nuts, seeds etc

→ And eliminate these breakfast energy killers:

  1. Gluten containing grains – wheat, rye, spelt (i.e. toast, pop tarts, pastries, regular breakfast cereals)
  2. Sugar – particularly fructose-containing sugar (flavoured yoghurts, jams, regular breakfast cereals, fruit juice) – see more on sugar here
  3. Dairy products (milk, yoghurt)
  4. Processed meat (bacon, sausages etc.)

If you can hit these rules and avoid these energy killers you will soon notice how incredible you’re SUPPOSED to feel in the morning!

Three 5-Minute Breakfasts That Tick Every Box

So today I’m giving you my three faves that meet all of these criteria and get you off to a FLYING start.

By consuming one of these three breakfasts every day you will notice very quickly that you have improvements with:

  • Memory & mental focus
  • Staying fuller for longer and no snack attacks mid morning
  • Far less sugar & carb cravings
  • Better moods
  • Weight loss (if needed)
  • Soothed digestion and reduction of reflux conditions
  • Calmed inflammation, aches and pains

And because breakfast can be such a hectic time getting out of the door – I have tailored and developed these recipes to make them FAST and easy.

Let’s do it:

Breakfast 1: Perfectly Balanced, High Alkaline Breakfast Smoothie

breakfast smoothie

This is a consistent favourite in my house, and with visiting friends and family too. It tastes delicious, contains greens but doesn’t taste of greens, and has everything you need to get the day off to the PERFECT start:

Perfectly Balanced Alkaline Breakfast Smoothie
Serves 2
Write a review
Print
Prep Time
3 min
Cook Time
2 min
Total Time
5 min
Prep Time
3 min
Cook Time
2 min
Total Time
5 min
Ingredients
  1. 250ml coconut milk
  2. 200ml filtered water
  3. 1tbsp coconut oil
  4. Handful almonds
  5. Handful cashews
  6. Handful organic oats
  7. Handful chia seeds
  8. 1/2 avocado
  9. 1 cucumber
  10. 1 large handful baby spinach/kale leaves
Instructions
  1. Put the liquids and the chia seeds into the blender and leave for 2 minutes to allow the chia to soften a little and go gelatinous.
  2. Then add the remaining ingredients and blend until smooth.
Notes
  1. Note: if you don’t have a high powered blender you may have to soak the almonds and cashew overnight to soften them.
  2. Extra Note: if you want to add more protein and some of the resistant starch, you can include 25-50g of cooked kidney beans. This is totally optional.
Live Energized https://liveenergized.com/

This recipe contains 12g protein per serve and 18.5g fibre – which is over half your daily needs and from a blend of sources, which is ideal. If you include the kidney beans you’re going to be over 20g and include that resistant starch too.

And fats…from the coconut oil, cashews, almonds, avocado, chia, greens…you’re getting plenty!


Breakfast 2: Creamy Coconut & Vanilla Bircher Pots

bircherpots

This pre-prepared beauty is a thing of wonder. Containing an abundance of everything you need to get moving and balance your body’s processes, cycles and ignite the metabolism – this tastes like a real treat.


Creamy Coconut & Vanilla Bircher Pots
Serves 2
Write a review
Print
Prep Time
5 min
Total Time
5 min
Prep Time
5 min
Total Time
5 min
Ingredients
  1. 1 cup gluten free oats
  2. 1 tbsp coconut oil
  3. 1 tbsp chia seeds
  4. 1 tbsp shredded coconut
  5. 1 tsp ground vanilla beans/vanilla paste
  6. 1 tbsp flax meal
  7. 1 cup almond milk
  8. 1 chopped date
  9. 1 tablespoon pumpkin seeds
  10. 1 tablespoon sunflower seeds
  11. Pinch of cinnamon
  12. Pinch of Himalayan salt
Instructions
  1. Put all of the ingredients into a mason jars and stir well
  2. Leave in the fridge overnight
  3. Serve! Optionally with coconut yoghurt for extra creaminess.
Notes
  1. Note: it’s easy to make 6 or 7 of these at a time as they will last all week in the fridge
Live Energized https://liveenergized.com/

Breakfast 3: Chai-Infused Quinoa Porridge

quinoa porridge

This chai-spice inspired quinoa porridge is HUGELY anti-inflammatory, while having those important protein/fibre/fat-rich ingredients too.

It’s a warming option for everyone reading this in winter!


Chai-Infused Quinoa Porridge
Serves 2
Write a review
Print
Prep Time
5 min
Cook Time
5 min
Total Time
10 min
Prep Time
5 min
Cook Time
5 min
Total Time
10 min
Ingredients
  1. 1 cup of dry quinoa (pref organic)
  2. 1 tbsp chia seeds
  3. 2 cups of water (pref alkaline)
  4. 1 stick of cinnamon (or 1/2 teaspoon dried)
  5. 1 1/2 teaspoons ground ginger or 1 inch piece of fresh root ginger finely grated
  6. 1/2 teaspoon ground nutmeg (pref fresh grated)
  7. 1/2 cup of coconut cream or milk (depending on how creamy you want it)
  8. 1/2 lemon skin grated (or lime)
  9. 1 vanilla bean pod or vanilla paste
  10. Half a handful of cashew, almonds, brazil nuts or any other nut to your taste
  11. 1 tbsp coconut oil
  12. Optional: coconut yoghurt
, cloves, ground
, 1/2 grated apple
Instructions
  1. First prepare the quinoa to the packet instructions (approx 2 parts water to 1 part quinoa in a saucepan, brought to a boil and then turned down to a simmer and covered until all water evaporated)
  2. Once the quinoa is cooked and drained, add it back to the saucepan and stir in the chai spices (cinnamon, ginger, nutmeg and cloves if you’ve done them in a pestle and mortar) and add the coconut cream or milk and throw in the scraped out vanilla pod (or add the drop or two of vanilla essence).
  3. You can pick either the milk or cream depending on how creamy and thick you want it.
  4. When it’s ready, grate in the apple if you’re using it – right at the end.
  5. Warm through and then serve in a big bowl. To serve, add the lemon rind grated onto the top and sprinkle with extra ground cinnamon. Finally throw on the seeds and nuts (I recommend sesame seeds with this especially).
  6. As an indulgent extra, you can also serve with a dollop of coconut yoghurt, which is alkaline and JUST DELICIOUS!
Live Energized https://liveenergized.com/

Without the Right Nutrients at Breakfast the Body Goes into Hormonal, Acidic, Inflammatory Turmoil…

If you’ve ever had daytime fatigue, mid-morning and mid-afternoon slumps and sugar cravings, disturbed sleep or difficulty getting to/staying asleep, easy weight gain but difficult weight loss, poor memory or concentration during the day, aches and pains….

Your breakfast could easily be the culprit. The hormonal imbalances caused by a lack of (or the wrong kind of) breakfast are devastating and far-reaching.

If you don’t get these healthy fats, fibre and protein at breakfast your blood sugar and insulin will go on a haywire journey of spikes and troughs…knocking on to your cortisol levels, with high cortisol needed to mop up the damage of the high insulin…needed because of the high blood sugar…

The constant need for insulin (for the high blood sugar) and cortisol (for the high insulin) completely stresses your adrenals, which knocks on to the thyroid, pituitary…and practically every other area of your hormone-regulating system (your endocrine system).

All you’ve got to do it stick to these three, super-fast, super-simple breakfasts and you’re going to be thriving!
Sometimes having an energised body and reaching the health of our dreams is a LOT easier than we’ve been led to believe – and getting breakfast sorted is one of those things.

Keep it simple and let’s do this!
Ross


Read Next: The “Bulletproof” TEA that’s adrenal-healing, alkaline, anti-inflammatory and will make you FLY in the mornings!

The post 3 Fast Alkaline Breakfasts To Make You Feel Refreshed And Ready To Take On The World appeared first on Live Energized.

Alkaline Recipe #198: 6-Ingredient Anti-Inflammatory, Alkaline Sweet Potato Brownies

$
0
0

This is the The Easiest Sweet Potato Brownie recipe you’ll ever see!

Including alkaline, anti-inflammatory and anti-oxidant rich ingredients, it only takes 15-20 minutes to make!

I love this for it’s speed, ease and deliciousness – gets you out of a bother when you have a sweet tooth but contains only 3-4g of sugar per serve! That’s practically nothing!

Recipe: Sweet Potato Brownies

Ingredients

1 whole medium sweet potato
2 cups almonds (or cashews or a mix)
5 tablespoon raw cacao powder
1 pinch Himalayan salt
¼ cup coconut oil, melted
¼ cup rice malt syrup

Optional: 1 tablespoon coconut flour (optional but adds to texture)

Method:

1) start by peeling and chopping the sweet potato into large, rough chunks and then boil until soft (about 15-20 minutes depending on the size of the chunks)

2) Set that aside and cool and in the meantime, blend the nuts, cacao and salt until reasonably fine.

3) Put this in a mixing bowl with the coconut oil, coconut flour (if using) and rice malt syrup and mix through thoroughly.

4) Once the sweet potato has cooled, mash this and then stir and fold this into the mixture.

5) Put everything into a lined or lightly greased pan and press it down firmly, and then put into the fridge or freezer (depending on how you’re going to use it – see below).

This makes about a dozen decent slices (or more if you want them for snacks) and contains zero fructose and very little sugar – BUT – lots of protein, fibre and healthy fats to keep you going for hours.

If you are going to eat all of them between yourself, family, guests etc these within a couple of days, put straight into the fridge. However, if you are planning on having them slowly over a week or two, cover and put in the freezer as sliced, individual serves. You can remove them and enjoy within just 10-15 minutes of taking them out of the freezer.

Sweet Potato Brownies
Yields 12
Write a review
Print
Prep Time
15 min
Cook Time
5 min
Total Time
20 min
Prep Time
15 min
Cook Time
5 min
Total Time
20 min
Ingredients
  1. 1 whole medium sweet potato
  2. 2 cups almonds (or cashews or a mix)
  3. 5 tablespoon raw cacao powder
  4. 1 pinch Himalayan salt
  5. ¼ cup coconut oil, melted
  6. ¼ cup rice malt syrup
Instructions
  1. 1) start by peeling and chopping the sweet potato into large, rough chunks and then boil until soft (about 15-20 minutes depending on the size of the chunks)
  2. 2) Set that aside and cool and in the meantime, blend the nuts, cacao and salt until reasonably fine.
  3. 3) Put this in a mixing bowl with the coconut oil, coconut flour (if using) and rice malt syrup and mix through thoroughly.
  4. 4) Once the sweet potato has cooled, mash this and then stir and fold this into the mixture.
  5. 5) Put everything into a lined or lightly greased pan and press it down firmly, and then put into the fridge or freezer (depending on how you’re going to use it – see below).
Notes
  1. This makes about a dozen decent slices (or more if you want them for snacks) and contains zero fructose and very little sugar – BUT – lots of protein, fibre and healthy fats to keep you going for hours.
  2. If you are going to eat all of them between yourself, family, guests etc these within a couple of days, put straight into the fridge. However, if you are planning on having them slowly over a week or two, cover and put in the freezer as sliced, individual serves. You can remove them and enjoy within just 10-15 minutes of taking them out of the freezer.
Live Energized https://liveenergized.com/

Read Next: My Amazing Chilli-Chai Hot Chocolate Recipe!

The post Alkaline Recipe #198: 6-Ingredient Anti-Inflammatory, Alkaline Sweet Potato Brownies appeared first on Live Energized.

Alkaline Recipe #200: Amazingly Easy No-Bake Breakfast Bars!

$
0
0

THESE ARE RIDICULOUSLY EASY AND DELICIOUS! I love them so much. They’re great to make in bulk and have stored, and are so fast.

They are also tasty, have the anti-inflammatory properties from the ginger, protein and fibre from the oats, healthy fats from the coconut oil and if you use the flaxmeal, omega 3 from here too!

Give these a try they’re so flippin easy!

No-Bake Alkaline Breakfast Bars

Ingredients:
5 cups uncooked oatmeal (quick oats)
320g almond butter
1 cup coconut cream
3 tbsp rice malt syrup (brown rice syrup)
1 inch ginger (or 2 tsp ground ginger)
2 tbsp coconut oil

Optional: swap 1 cup of oatmeal for 1 cup flaxmeal

Directions

  1. Put the coconut cream, coconut oil and rice malt syrup into a large mixing bowl and whisk until everything is combined
  2. Now add the almond butter and grate in the ginger and whisk until it’s all combined. The almond butter – depending on the temperature of your room may stay a little in a clump/lump – but don’t worry about this because…
  3. Now that you add the oats (and flax) you can mix with a spoon to smooth it all out. If it’s still lumpy you can use your hands (which is lots of fun) to mix together.
  4. Now take a flat baking dish, lined with baking/parchment paper and flatten the mixture out into the dish
  5. Refigerate for a minimum of 2 hours, or overnight and then cut into bars. These will stay good for at least a week in the fridge

The post Alkaline Recipe #200: Amazingly Easy No-Bake Breakfast Bars! appeared first on Live Energized.

3 Mindblowingly Delicious, Vegan Cashew Cheese Recipes

$
0
0

I am always looking for ways to make the alkaline diet – and getting you to your health goals – easier, more achievable and more do-able.

And having recipes like these really ups the flavour and makes your “mostly-plant-based” meals delicious.

That’s one of my rules with eating healthy – it has to be ridiculously tasty.

So many people start the alkaline diet and end up eating a plate of steamed veg, or a super-plain salad every meal and then wonder why they’re giving up after 48 hours.

To turn this around, always remember that even the most simple meal can be made exciting and delicious with sauces, dips, dressings and sides, and these three cashew cheese recipes certainly do that.

They’re all from a similar base, but have their nuances that change the flavour, consistency and use. And you can make them in a decent quantity and store in the fridge too for use throughout the week – which is very handy when you don’t have a lot of time to spend in the kitchen every day.

Let’s get into them – let me know which one you’re going to try first in the comments below!

Three Delicious, Alkaline & Vegan Cashew Cheese Recipes

1. Cashew Cream Cheese Spread

cashew cream cheese recipe

Cashew Cream Cheese Spread
Write a review
Print
Cook Time
2 min
Cook Time
2 min
Ingredients
  1. 1 1/2 cups raw cashews
  2. 1-2 cloves garlic
  3. 1/4 cup filtered water
  4. 2 tbsp fresh lemon juice
  5. 1/2 tsp sea salt
Instructions
  1. Soak your cashews in filtered water for a minimum of 2 hours (preferably 4) - you can skip this step if you have a high powered blender like a Vitamix.
  2. Drain and rinse the cashews well and the put them into a blender with the garlic, water, lemon juice and sea salt
  3. Blend until creamy and delicious
Live Energized https://liveenergized.com/

2. Baked Cashew Cheese

baked cashew cheese

Oven Baked Cashew Cheese
Write a review
Print
Cook Time
40 min
Cook Time
40 min
Ingredients
  1. 1 1/2 cups cashews
  2. 1/4 cup freshly squeezed lemon juice
  3. 1/2 cup filtered water
  4. 2 tbsp. olive oil
  5. 1 tbsp. coconut oil
  6. 1 clove garlic
  7. 1 1/2 tsp. sea salt
Instructions
  1. Soak the nuts for at least 6 horus, but preferably overnight in a bowl of filtered water (if you have a high speed blender like a Vitamix you can skip this step.
  2. Rinse the nuts thoroughly and drain and then put into the blender with the rest of the ingredients
  3. Blend until smooth
  4. Spoon the mixture from the blender into a cheesecloth and place it in a strainer or sieve over a bowl and put this in the fridge overnight (or for at least 6 hours)
  5. The next day turn the cheese out of the cheesecloth into an oiled, ovenproof dish and bake at 170 degrees celcius/350 degrees fahrenheit and bake this for 35-40 minutes until the cheese is firm and cracking and going golden brown.
  6. Serve either warm from the oven OR put in the fridge to chill.
Live Energized https://liveenergized.com/

3. Firm Cashew Cheese (Sliceable)

firm cashew cheese recipe

This one is a little more ‘involved’ that the other two, but is well worth it!

Firm Cashew Cheese
Write a review
Print
Ingredients
  1. 1 cup cashews
  2. 6 tbsp filtered water
  3. 1 clove garlic
  4. 1 tbsp lemon juice
  5. 1 ½ tbsp agar agar powder (or beef gelatin if not vegetarian)
  6. Sea salt to taste
Instructions
  1. Start by soaking the cashews in filtered water for at least 4 hours, preferably overnight (you can skip this step if you have a high-speed blender such as a Vitamix)
  2. Once soaked, rinse thoroughly and drain
  3. Put the cashews in a blender with 4 tbsp of filtered water, the garlic clove (sliced/minced) and the lemon juice and blend until thick
  4. Transfer mixture into a bowl and set aside.
  5. In a small pan add agar agar/gelatin and 2 tablespoons of filtered water and let this stand for five minutes and then warm gently over a very low heat and stir until dissolved
  6. Now add the dissolved gelatin/agar agar to the cheese, season and combine until it is well mixed
  7. Finally, to firm - put the mixture into a small dish or bowl - oiled - smooth with a spatula and refrigerate overnight
Live Energized https://liveenergized.com/

Recipes Like These Make It SO MUCH EASIER!

P.S. Take a look at the Alkaline Recipe System. With hundreds of easy-to-prepare Alkaline recipes PLUS 7 goal-based meal plans each with itemized shopping lists (for goals including weight loss, more energy, better digestion, clearer skin and more) – it makes reaching your health goals SO easy!

+ Make sure to sign up for our free newsletter to get our latest alkaline recipes delivered weekly (it’s free).

The post 3 Mindblowingly Delicious, Vegan Cashew Cheese Recipes appeared first on Live Energized.


Nine Delicious Bliss Ball Recipes to End Mid-Morning Fatigue

$
0
0

Protein/Energy Balls, also known as “Bliss Balls”,  are perfect for when hunger strikes or the sweet tooth beckons! Super easy and super fast, you can pre-make a batch or two and keep in the fridge for 1-2 weeks!

Filled with healthy fats, alkalinity, protein and fibre, there the perfect mid-morning or mid-afternoon snack, for after a workout or just for when you feel like something a little sweeter.

Lemon, Cashew & Coconut Energy Balls

lemon-coconut-and-cashew-energy-balls-1

These delicious energy balls from Nourish Everyday have a wonderful balance of flavors topped off with zesty lemon!

Matcha Pistachio Bliss Balls

matcha-pistachio-bliss-balls-2

With Pistachio and Matcha powder these GREEN POWER balls that will keep you going all day! From Downshiftology.

Apricot, Almond & Coconut Bliss Balls

3-ingredient-apricot-almond-coconut-bliss-balls-sm

With only 3 ingredients you’ll have these tasty morsels from The Cooks Pyjamas ready in no time!

Coconut Cacao Bon Bons

Coconut-Cacao-bon-bon

Deliciously chewy and chocolatey these energy balls make a great healthy treat for those afternoon cravings. From The Little Green Spoon.

Chocolate Trail Mix Power Balls

chocolate-trailmix-powerballs

Perfect for your busy, healthy lifestyle, these power balls from Young & Rungry are packed full of sustainable energy and balanced nutrients. Yum!

Pecan Pie Energy Bites
pecan-pie-bliss-ball

Pecans give these energy balls a wonderful buttery flavor, and taste just like pecan pie! From the Gluten Free Vegan Pantry.

No-Bake Almond Joy Energy Balls

almond-joy

You won’t be reaching for an unhealthy chocolate bar when you have these bliss balls around! With a double hit of almond, swap out the cocoa for cacao to make these extra guilt-free! From The Healthy Maven.

Raw Cacao, Pistachio & Almond Bliss Balls

Bliss-Ball-Tower-750

This super simple and delicious bliss ball is one of my favorites (and my son’s) and a staple in my house! Find the recipe here.

Key Lime Pie Energy Balls

key-lime-energy-balls

With just 5 ingredients; macadamia nuts, coconut, lime, dates and a sprinkle of salt, these energy balls from Every Last Bite are so moreish – they taste like summer!


I hope you love these recipes! If you have one of your own do feel free to post it in the comments below – I’d love to hear from you!
Ross

P.S. Take a look at the Alkaline Recipe System. With hundreds of easy-to-prepare Alkaline recipes PLUS 7 goal-based meal plans each with itemized shopping lists (for goals including weight loss, more energy, better digestion, clearer skin and more) – it makes reaching your health goals SO easy!

+ Make sure to sign up for our free newsletter to get our latest alkaline recipes delivered weekly (it’s free).

The post Nine Delicious Bliss Ball Recipes to End Mid-Morning Fatigue appeared first on Live Energized.

Alkaline Recipe #204: Turmeric Roasted Cauliflower with Mint & Coriander

$
0
0

This is a warm, hearty, alkaline, anti-inflammatory side dish – that tastes out of this world.

This is one of those recipes that you make once, and then it becomes one of your staples – one of those star dishes you have all of the time, and that’s always on standby.

The combination of the gently roasted cauliflower softening, with the coconut oil and the subtlety of the turmeric brings out an almost sweetness to this dish.

Works brilliantly as a warm dish in winter OR chilled in summer (and can even be served with some unsweetened coconut yoghurt and pomegranate seeds to make it a salad in it’s own right) – it’s great all year ’round.

And you know that the combination of the coconut oil, cauliflower and turmeric is making this dish about as alkaline-forming, anti-inflammatory and antioxidant-rich as it comes. It’s a brilliantly healthy meal.

Turmeric Roasted Cauliflower with Mint & Coriander

Roasted Cauliflower & Turmeric with Coriander and Mint
Serves 4
Write a review
Print
Prep Time
15 min
Cook Time
15 min
Total Time
30 min
Prep Time
15 min
Cook Time
15 min
Total Time
30 min
Ingredients
  1. 1/2 cup coconut oil
  2. 1 tablespoon ground cumin
  3. 2 teaspoons ground turmeric (preferably organic)
  4. 1 large cauliflower, broken down into bitesized florets
  5. 1/4 cup pine nuts
  6. 2 tablespoons coriander/cilantro, chopped roughly
  7. 1 tablespoon mint, chopped roughly
  8. Himalayan salt to taste
Instructions
  1. Preheat the oven to 425°/220°
  2. Now it's time to get your hands dirty, so, in a large bowl, combine the coconut oil, cumin, turmeric, 1/2 teaspoon of salt and mix together with your hands (to warm the oil and properly combine everything)
  3. Next, add in the cauliflower florets and mix it all through so everything gets covered and oily
  4. Spread the cauliflower out onto a large baking tray and put into the preheated oven for around 15-20 minutes until the cauliflower softens and just starts to brown
  5. And while this is cooking, chuck the pine nuts onto a little baking tray and put into the oven too for about a minute to toast them slightly.
  6. To serve, transfer the cauliflower to a large serving bowl and sprinkle with the pine nuts, coriander/cilantro and mint and serve.
Notes
  1. Optional, mix the coriander/cilantro and mint into some unsweetened coconut yoghurt and serve this as a side to the cauliflower.
Live Energized https://liveenergized.com/

I hope you love this – it’s certainly one of my favourites right now!

Ross

P.S. Take a look at the Alkaline Recipe System. With hundreds of easy-to-prepare Alkaline recipes PLUS 7 goal-based meal plans each with itemized shopping lists (for goals including weight loss, more energy, better digestion, clearer skin and more) – it makes reaching your health goals SO easy!

+ Make sure to sign up for our free newsletter to get our latest alkaline recipes delivered weekly (it’s free).

The post Alkaline Recipe #204: Turmeric Roasted Cauliflower with Mint & Coriander appeared first on Live Energized.

Alkaline Recipe #205: Gluten-Free Buckwheat & Pumpkin Pancakes

$
0
0

This is a great warming, filling, simple breakfast that really feels like a treat!

Packed with potassium, and anti-inflammatories, it’s supportive of the kidneys while also giving a decent punch of fibre and protein too.

This is a great one for a weekend treat, while still being alkaline and healthy and with zero gluten, fructose, processed foods or acid-forming foods.
 

Gluten-Free Buckwheat & Pumpkin Pancakes
Write a review
Print
Prep Time
25 min
Cook Time
10 min
Total Time
35 min
Prep Time
25 min
Cook Time
10 min
Total Time
35 min
Ingredients
  1. 1 1/2 cups buckwheat flour
  2. 1 teaspoon baking powder
  3. 1/2 teaspoon sea salt
  4. ½ teaspoon ginger
  5. ¼ teaspoon allspice
  6. ¼ teaspoon nutmeg
  7. ½ teaspoon cinnamon
  8. ½ medium sized pumpkin or butternut squash
  9. 2 tablespoons ground flax seeds
  10. 2 tablespoons brown rice syrup/rice malt syrup
  11. 2 cups almond milk
  12. 2 tbsp coconut oil
Instructions
  1. Start by making the pumpkin puree: peel and chop the pumpkin into 3/4 in chunks and steam for 15 minutes until soft, and then blend until smooth with a little coconut oil.
  2. Combine the flour, baking powder, salt and spices in a large bowl and set aside.
  3. Now combine the pumpkin, flax, rice malt syrup and almond milk in a small bowl and whisk until smooth.
  4. Pour the dry ingredients into the wet, and whisk further until well combined. Let the batter stand for ten minutes.
  5. Set a large pan over medium-low heat; coat it generously with coconut oil
  6. Once it has reached a reasonably hot temperature (i.e. not cold) and spoon a large spoon of the batter into the pan.
  7. Cook until bubbles start to form, then flip and cook on the other side until brown.
  8. Repeat with the remaining batter, adding more coconut oil or butter for each batch.
  9. Serve immediately with coconut yoghurt, fruit or the topping of your choice!
Notes
  1. Optional other toppings include chopped nuts & seeds, lemon & orange juice (freshly squeezed), rice malt syrup/brown rice syrup
Live Energized https://liveenergized.com/
Enjoy and let me know your topping variations!
Ross

P.S. Take a look at the Alkaline Recipe System. With hundreds of easy-to-prepare Alkaline recipes PLUS 7 goal-based meal plans each with itemized shopping lists (for goals including weight loss, more energy, better digestion, clearer skin and more) – it makes reaching your health goals SO easy!

+ Make sure to sign up for our free newsletter to get our latest alkaline recipes delivered weekly (it’s free).

The post Alkaline Recipe #205: Gluten-Free Buckwheat & Pumpkin Pancakes appeared first on Live Energized.

Alkaline Recipe #206: “Cheesy” Pumpkin Broccoli Soup

$
0
0

Pumpkin is such a wonderful base for so many meals, especially during the colder months. Comforting, thick and creamy, a delicious and easy way to get in lots of alkalizing nutrients thanks to broccoli, celery, and almonds. I topped mine with some gluten-free bread croutons, smoked paprika and parsley.

The Recipe: “Cheesy” Pumpkin Broccoli Soup

Serves: 4 (generous portions)

Preparation time: 35 mins

Ingredients

1 tbsp coconut oil

1 medium onion, chopped

2 garlic cloves, minced

1 cup chopped celery

4 cups broccoli florets

3 cups chopped pumpkin (I used butternut)

4 cups vegetable broth

2 cups almond milk or other plant-based milk of your choice (you can add more or less depending on the thickness you prefer)

1/4 tsp cayenne pepper or flakes, optional

1/2 tbsp lemon juice

Pink salt & black pepper, to taste

1/4 cup fresh chopped parsley and some for garnish

Smoked paprika as a garnish, optional

Instructions

Melt the oil and cook the chopped onion until translucent, about 5 – 6 minutes, add the garlic and cook for 1 more minute. Add celery and pumpkin, broth, nutritional yeast, cayenne and simmer until almost soft, about 10 – 12 minutes. I always add the broccoli later so I limit the cooking time, add it now and cook 5 more minutes.

Transfer the soup to the blender – divide in a few batches, add almond milk and blend until smooth or a bit chunky, how you like it. You can reheat the soup if you wish.

Stir in lemon juice, pink salt, and black pepper if needed, the chopped parsley and top it with some more parsley and smoked paprika.

I made some croutons from some older gluten-free bread. To make these I cut the bread into cubes, baked it in a little olive oil and sprinkled it with garlic powder.


"Cheesy" Pumpkin & Broccoli Soup
Serves 4
Comforting, thick and creamy, a delicious and easy way to get in lots of alkalizing nutrients thanks to broccoli, celery and almonds.
Write a review
Print
Prep Time
10 min
Cook Time
25 min
Total Time
35 min
Prep Time
10 min
Cook Time
25 min
Total Time
35 min
Ingredients
  1. 1 tbsp coconut oil
  2. 1 medium onion, chopped
  3. 2 garlic cloves, minced
  4. 1 cup chopped celery
  5. 4 cups broccoli florets
  6. 3 cups chopped pumpkin (I used butternut)
  7. 4 cups vegetable broth
  8. 2 cups almond milk or other plant-based milk of your choice (you can add more or less depending on the thickness you prefer)
  9. 4 tbsp nutritional yeast
  10. 1/4 tsp cayenne pepper or flakes, optional
  11. 1/2 tbsp lemon juice
  12. Pink salt & black pepper, to taste
  13. 1/4 cup fresh chopped parsley and some for garnish
  14. Smoked paprika as a garnish, optional
Instructions
  1. Melt the oil and cook the chopped onion until translucent, about 5 - 6 minutes, add the garlic and cook for 1 more minute. Add celery and pumpkin, broth, nutritional yeast, cayenne and simmer until almost soft, about 10 - 12 minutes. I always add the broccoli later so I limit the cooking time, add it now and cook 5 more minutes.
  2. Transfer the soup to the blender - divided in a few batches, add almond milk and blend until smooth or a bit chunky, how you like it. You can reheat the soup if you wish.
  3. Stir in lemon juice, pink salt and black pepper if needed, the chopped parsley and top it with some more parsley and smoked paprika.
Notes
  1. I made some croutons from some older spelt sourdough. To make these I cut the bread into cubes, baked it in a little olive oil and sprinkled it with garlic powder.
Live Energized https://liveenergized.com/

I hope you enjoyed this guest post from alkaline blogger, and Live Energized friend, Tina Redder. Learn more about Tina and her alkaline lifestyle on her website. You can also follow her on Instagram @tinas_alkaline_diet

The post Alkaline Recipe #206: “Cheesy” Pumpkin Broccoli Soup appeared first on Live Energized.

Alkaline Recipe #207: Quinoa Stuffed Spaghetti Squash

$
0
0

This quinoa stuffed squash is such a wonderful, comforting meal you and your family can enjoy this holiday season (or anytime!). It’s loaded with nutrients and plenty of plant-based protein.

The Recipe: Quinoa Stuffed Spaghetti Squash

Serves: 2

Preparation time: 60 mins

Ingredients

1 big or two smaller spaghetti squashes

2 tbsp. coconut oil

1 cup steamed green peas

1 medium shallot

1 orange or red bell pepper

2 spring onions, white part, sliced

1/4 cup chopped walnuts

1 and 1/2 cup cooked quinoa

2 tsp. dried thyme

1 tsp. garlic powder

Pink salt and black pepper to taste

Instructions

Preheat the oven to 400ºF

Wash the squash and slice them in half. Remove seeds and bake until tender, about 40 minutes.

While the squash is roasting heat 1 tbsp. oil in a skillet and cook the finely chopped shallot and bell pepper until soft. Add spices, green peas, cooked quinoa and walnuts until warmed through. Flavour with pink salt and pepper.

Divide between the squash and place back in the oven for 5 – 8 minutes. Remove from the oven and serve with fresh greens on top, I used broccoli and a big green salad.

Spaghetti squash has a light texture which makes it easy and fun to eat, you can scratch the flesh with a fork and it resembles spaghetti.


Quinoa Stuffed Spaghetti Squash
Serves 2
This quinoa stuffed squash is a wonderful, comforting meal you and your family can enjoy.
Write a review
Print
Total Time
1 hr
Total Time
1 hr
Ingredients
  1. 1 big or two smaller spaghetti squashes
  2. 2 tbsp. coconut oil
  3. 1 cup steamed green peas
  4. 1 medium shallot
  5. 1 orange or red bell pepper
  6. 2 spring onions, white part, sliced
  7. 1/4 cup chopped walnuts
  8. 1 and 1/2 cup cooked quinoa
  9. 2 tsp. dried thyme
  10. 1 tsp. garlic powder
  11. Pink salt and black pepper to taste
Instructions
  1. Preheat the oven to 400ºF
  2. Wash the squash and slice them in half. Remove seeds and bake until tender, about 40 minutes.
  3. While the squash is roasting heat 1 tbsp. oil in a skillet and cook the finely chopped shallot and bell pepper until soft. Add spices, green peas, cooked quinoa and walnuts until warmed through. Flavor with pink salt and pepper.
  4. Divide between the squash and place back in the oven for 5 – 8 minutes. Remove from the oven and serve with fresh greens on top, I used broccoli and a big green salad.
Notes
  1. Spaghetti squash has a light texture which makes it easy and fun to eat, you can scratch the flesh with a fork and it resembles spaghetti.
Live Energized https://liveenergized.com/

I hope you enjoyed this guest post from alkaline blogger, and Live Energized friend, Tina Redder. Learn more about Tina and her alkaline lifestyle on her website. You can also follow her on Instagram @tinas_alkaline_diet

The post Alkaline Recipe #207: Quinoa Stuffed Spaghetti Squash appeared first on Live Energized.

Alkaline Recipe #205: Summer Salad with Mint & Lemon Dressing

$
0
0

This delicious salad is simple beyond belief – and yet it packs such flavour, nutrition and texture. I love it because it tastes, looks and feels SO different to most other salads, but it’s still so easy.

The avocado and dressing bring plenty of healthy fats, there is so much of the vital B vitamins, folate, selenium, manganese and more in the asparagus, the coriander (cilantro) brings lots of chlorophyll and detoxification properties, the peas are a great source of manganese, fibre, vitamin C and more.

It’s a pretty, delicious, original, textured salad with a big alkaline nourishment punch!

Alkaline Recipe #205: Summer Salad with Mint & Lemon Dressing

Serves 4

Ingredients:

1 Avocado, Sliced
3 Bunches of Asparagus (to save some money you can get away with two)
1/2 Bunch of Cilantro (Coriander), Roughly Chopped
1/2 Bunch of Flat Leaf Parsley, Roughly Chopped
5 Radish, Thinly Sliced
200g Green Peas, Cooked
2 Zucchini (Courgette), Thinly Sliced Using a Vegetable Peeler

For the Dressing:

3 Lemons, Juiced
2 Shallots, Diced
1 Clove of Garlic, Crushed
190ml Olive Oil/Flax Oil or a Combination
15g Dijon Mustard
1/4 Bunch of Mint, Roughly Chopped
Himalayan Salt & Black Pepper to Taste

Directions

Start by preparing the asparagus, by blanching it (place it into boiling water for 1 minute and then drain and rinse under cold water asap) and then slicing along the length to create long strips.

Next very gently fry the zucchini in a griddle pan (or regular pan if you don’t have a griddle) until it’s just starting to brown.

Now begin assembling the salad by combining the asparagus, zucchini, avocado, cilantro, parsley, radish and peas in a large bowl.

Make the dressing by blending all ingredients in a blender or food processor.

Dress and season to taste and you’re away!

NOTE: the dressing will keep for up to a week in an airtight container in the fridge.

Alkaline Recipe #205: Summer Salad with Mint & Lemon Dressing
Write a review
Print
Prep Time
5 min
Cook Time
5 min
Prep Time
5 min
Cook Time
5 min
Ingredients
  1. 1 Avocado, Sliced
  2. 3 Bunches of Asparagus (to save some money you can get away with two)
  3. 1/2 Bunch of Cilantro (Coriander), Roughly Chopped
  4. 1/2 Bunch of Flat Leaf Parsley, Roughly Chopped
  5. 5 Radish, Thinly Sliced
  6. 200g Green Peas, Cooked
  7. 2 Zucchini (Courgette), Thinly Sliced Using a Vegetable Peeler
For the Dressing
  1. 3 Lemons, Juiced
  2. 2 Shallots, Diced
  3. 1 Clove of Garlic, Crushed
  4. 190ml Olive Oil/Flax Oil or a Combination
  5. 15g Dijon Mustard
  6. 1/4 Bunch of Mint, Roughly Chopped
  7. Himalayan Salt & Black Pepper to Taste
Instructions
  1. Start by preparing the asparagus, by blanching it (place it into boiling water for 1 minute and then drain and rinse under cold water asap) and then slicing along the length to create long strips.
  2. Next very gently fry the zucchini in a griddle pan (or regular pan if you don’t have a griddle) until it’s just starting to brown.
  3. Now begin assembling the salad by combining the asparagus, zucchini, avocado, cilantro, parsley, radish and peas in a large bowl.
  4. Make the dressing by blending all ingredients in a blender or food processor.
  5. Dress and season to taste and you’re away!
  6. NOTE: the dressing will keep for up to a week in an airtight container in the fridge.
Live Energized https://liveenergized.com/

The post Alkaline Recipe #205: Summer Salad with Mint & Lemon Dressing appeared first on Live Energized.

Alkaline Recipe #206: The Triple A Juice (Alkaline, Antioxidant-Rich, Anti-Inflammatory)

$
0
0

The Triple A Juice

This is a very important juice recipe. It’s delicious and it’s powerful. Why?

Everything I teach is designed to do two things:

  1. Rapidly get you to the energy of your dreams so you feel vibrant and alive all day long
  2. Give your body all of the tools it needs to thrive and protect you from ALL preventable sickness and diseases

Core to this is the belief (from an abundance of scientific research and medical studies) that inflammation, acidity and oxidation are at the root cause of practically all preventible diseases, sicknesses and health challenges.

By fuelling our body with antioxidants, alkalinity and anti-inflammatories, we’re giving our body everything it needs to repair, rebuild and thrive.

And this juice is a powerful in all three areas.

It’s called the Tripe A because it’s highly alkaline, antioxidant-rich and packed with natures most potent anti-inflammatories.

And it’s delicious.

In my recent 7-Day Juice Challenge (in Jan 2017, almost 20k people took part in this free juice-fest!) it was possibly the most enjoyed juice.

And it’s definitely the most powerful.

Try it today and make it a part of your life. You’ll love it!

Alkaline Recipe #206: The Tripe A Juice (Alkaline, Anti-Inflammatory & Antioxidant-Rich)

Serves 2
Ingredients

2 handfuls spinach
2 handfuls kale
1/2 cucumber
1 stick of celery
1 inch ginger (more or less to taste)
1cm turmeric (or 1 tsp powdered)
1 red capsicum
1/2 small beetroot
1 carrot
Filtered water to taste

Instructions

Wash and juice all ingredients!

If you’re using a masticating juicer, chop the celery into chunks to prevent the string from clogging the juicer up.

You can dilute down with filtered water, coconut water, or any nut milk.

ENJOY!

Ross


The post Alkaline Recipe #206: The Triple A Juice (Alkaline, Antioxidant-Rich, Anti-Inflammatory) appeared first on Live Energized.


Alkaline Recipe #207: Roast Cauliflower & Turmeric Curry

$
0
0

This beautiful, hearty curry is not only alkaline, but is highly anti-inflammatory, combining four of the most powerfully anti-inflammatory foods on Earth into deliciousness.

The abundance of turmeric, ginger, garlic and bell pepper (not to mention the healthy fats from the coconut oil, nuts and seeds) are all super anti-inflammatory, and will fortify your immune system too.

I absolutely love this recipe. If you enjoy it too be sure to let me know!

Alkaline Recipe #207: Roasted Cauliflower & Turmeric Curry

Cauliflower & Turmeric Curry

Serves 4
Ingredients

FOR THE MASALA:

1 1/2 tablespoons coriander seeds
1 teaspoon cumin seeds
A pinch of cardamom powder
1 1/4-inch cinnamon stick
6 cloves
1/2 cup raw cashews

FOR THE CURRY:

1 teaspoon turmeric powder
1/2 teaspoon salt
2 cups cauliflower florets
2 tablespoons coconut oil
3 cloves of garlic, minced
1cm of fresh ginger root, grated (or 1 teaspoon ginger powder)
1 bell pepper/capsicum, diced
2 cups red onions, finely chopped
1/2 cup Roma tomatoes, finely chopped
1cm of fresh turmeric
1/2 teaspoon chilli powder
2 cups unsweetened coconut milk
1 teaspoon Himalayan salt
1/2 teaspoon garam masala
1 1/2 cups water (as needed)
1 tablespoon chopped coriander (cilantro)

Instructions

Step One: Preparing the Turmeric Roasted Cauliflower

Start by preheating the oven to 200°C / 400°F

Next, in a large mixing bowl, put the cauliflower, powdered turmeric, a pinch of salt and coconut oil inside and then get your hands in there and rub it all together.

Pour this mix out onto a baking tray lined with baking paper and then put into the oven for 20-30 minutes -checking regularly that the cauliflower doesn’t start to burn. A little is fine, but don’t let it overcook.

Step Two: The Curry

While the cauliflower is happily cooking away you need to make the masala. Do this by simply throwing all of the masala ingredients into a food processor or blender and blending until it’s completely smooth. We want no lumps here!

Now, heat the coconut oil over a gentle heat in a large pan and then add the garlic, ginger and onions and cook gently for 2-3 minutes.

Next add the tomatoes and bell pepper/capsicum and cook until the tomatoes become loose and begin to fall apart a little.

At this point you need to add the masala mix and stir this through for another 2-3 minutes – don’t let it stick or burn. Once this is mixed through add the turmeric, chilli powder and then the coconut milk and as much of the water as you need to get the consistency you want.

Turn the heat right down to a simmer and let it cook for five minutes. Season to taste and once the cauliflower is ready, remove it from the oven and add it to the pan.

Mix through again and then turn off the heat. Once you’re ready to serve, stir through the coriander/cilantro and serve!

Goes well with quinoa or brown rice.


Roast Cauliflower & Turmeric Curry
Serves 4
This beautiful, hearty curry is not only alkaline, but is highly anti-inflammatory, combining four of the most powerfully anti-inflammatory foods on Earth into deliciousness. The abundance of turmeric, ginger, garlic and bell pepper (not to mention the healthy fats from the coconut oil, nuts and seeds) are all super anti-inflammatory, and will fortify your immune system too. I absolutely love this recipe. If you enjoy it too be sure to let me know!
Write a review
Print
Prep Time
10 min
Cook Time
35 min
Prep Time
10 min
Cook Time
35 min
FOR THE MASALA
  1. 1 1/2 tablespoons coriander seeds
  2. 1 teaspoon cumin seeds
  3. A pinch of cardamom powder
  4. 1 1/4-inch cinnamon stick
  5. 6 cloves
  6. 1/2 cup raw cashews
FOR THE CURRY
  1. 1 teaspoon turmeric powder
  2. 1/2 teaspoon salt
  3. 2 cups cauliflower florets
  4. 2 tablespoons coconut oil
  5. 3 cloves of garlic, minced
  6. 1cm of fresh ginger root, grated (or 1 teaspoon ginger powder)
  7. 1 bell pepper/capsicum, diced
  8. 2 cups red onions, finely chopped
  9. 1/2 cup Roma tomatoes, finely chopped
  10. 1cm of fresh turmeric
  11. 1/2 teaspoon chilli powder
  12. 2 cups unsweetened coconut milk
  13. 1 teaspoon Himalayan salt
  14. 1/2 teaspoon garam masala
  15. 1 1/2 cups water (as needed)
  16. 1 tablespoon chopped coriander (cilantro)
Instructions
  1. Step One: Preparing the Turmeric Roasted Cauliflower
  2. Start by preheating the oven to 200°C / 400°F
  3. Next, in a large mixing bowl, put the cauliflower, powdered turmeric, a pinch of salt and coconut oil inside and then get your hands in there and rub it all together.
  4. Pour this mix out onto a baking tray lined with baking paper and then put into the oven for 20-30 minutes -checking regularly that the cauliflower doesn’t start to burn. A little is fine, but don’t let it overcook.
  5. Step Two: The Curry
  6. While the cauliflower is happily cooking away you need to make the masala. Do this by simply throwing all of the masala ingredients into a food processor or blender and blending until it’s completely smooth. We want no lumps here!
  7. Now, heat the coconut oil over a gentle heat in a large pan and then add the garlic, ginger and onions and cook gently for 2-3 minutes.
  8. Next add the tomatoes and bell pepper/capsicum and cook until the tomatoes become loose and begin to fall apart a little.
  9. At this point you need to add the masala mix and stir this through for another 2-3 minutes – don’t let it stick or burn. Once this is mixed through add the turmeric, chilli powder and then the coconut milk and as much of the water as you need to get the consistency you want.
  10. Turn the heat right down to a simmer and let it cook for five minutes. Season to taste and once the cauliflower is ready, remove it from the oven and add it to the pan.
  11. Mix through again and then turn off the heat. Once you’re ready to serve, stir through the coriander/cilantro and serve!
  12. Goes well with quinoa or brown rice.
Live Energized https://liveenergized.com/

The post Alkaline Recipe #207: Roast Cauliflower & Turmeric Curry appeared first on Live Energized.

Alkaline Recipe #210: Turmeric Golden Paste

$
0
0

Turmeric Golden Paste is an absolutely, abundantly, amazing nutrient powerhouse. And creating this ‘Golden Paste’ means you can easily add turmeric and it’s incredibly anti-inflammatory properties to practically any mealtime!

It’s simple and easy to make, takes about five minutes and will keep for 2 weeks when refrigerated. It provides turmeric’s powerful compound, curcumin, alongside the black pepper (piperine) and fats that give it the maximum bioavailability.

Alkaline Recipe #210: Turmeric Golden Paste

Turmeric Golden Paste & Milk Recipe

Ingredients

1/2 cup (125 mls/60g) turmeric powder
1 cup water (250 mls) PLUS 1 cup water in reserve, if needed
1/3 cup (70 mls) one of the following oils: Raw (unrefined) Cold Pressed Coconut Oil, Linseed (flaxseed) oil or Virgin/Extra Virgin Olive Oil
2-3 teaspoons freshly ground black pepper

Instructions

1) Add the turmeric and water to a pot and simmer over gentle heat for about 7-10 minutes or until you have a thick paste, stirring frequently. You may need to add more water if the mixture becomes too dry.

2) Once you have a paste, remove from the heat and set aside to cool. When the paste is just warm to the touch whisk in the oil and pepper to finish.

3) Once fully cooled store your Golden Paste in a glass jar and pop in the fridge.

Golden paste will keep for 2 weeks when refrigerated, any excess can be frozen for future use.

The addition of fats – in the form of healthy oil, and piperine – found in black pepper, help the body to absorb curcumin, which is the active ingredient in turmeric but one that is not readily absorbed by the body.

If you find your paste is too watery feel free to add more turmeric. The same goes for if it’s too dry, simply add more water. Be sure to stir regularly as you don’t want it to burn. It will also help to create a nice, smooth paste. However, the texture of the paste in no way effects its properties so don’t worry if it’s not perfect!


7 Ways to use Golden Paste


1. Take half a baby spoonful (~ 1/4 to 1/2 teaspoon) and chase it with water…all done! 

This is great way to take turmeric (no fuss) and to spread it out through the day. As one teaspoon is equal to ~2,000 mg. it’s best to take smaller quantities 3-4 times per day.

2. Turmeric tea

You can add 1/4 teaspoon turmeric golden paste to a hot cup of already-brewed tea, add honey, maybe a splash of almond milk, and your quick turmeric tea is ready. The taste and texture may not seem like a “normal tea” as it has black pepper and oils … but it is tasty!

3. Add it to “rice” 

Turmeric golden paste can easily be added to quinoa or cauliflower “rice”. You can add 1 or more teaspoons after you have cooked your chosen rice substitute, while still warm which enables smooth mixing.

4. Add to smoothies

There’s no limit to the variations you can do here. Add turmeric golden paste to all kinds of smoothies and make your favourite ones even healthier, try it out!

5. Add to salads

This is the perfect way to make your favorite salads even healthier! Simply stir it in and eat. And best of all a small amount of turmeric paste won’t alter the taste much but you still get maximum benefit.

6. Add to dairy-free milk

Golden milk/turmeric milk is one of the most popular ways to take turmeric daily and is extremely popular in Asian countries. Simply add ¼ – ½ teaspoon to your choice of dairy free milk (I like almond) and drink it! Serve warm or cold. So easy.

7. Add to hot dishes and soups

Simply add a dollop of golden paste while cooking or add in once served. Stronger tasting dishes tend to hide the flavor so it’s great to add to most meals.

Golden paste is so versatile there’s no excuse not to take it, especially because you only need the smallest amount to gain the amazing benefits that Turmeric offer!

Turmeric Golden Paste
Write a review
Print
Total Time
15 min
Total Time
15 min
Ingredients
  1. 1/2 cup (125 mls/60g) turmeric powder
  2. 1 cup water (250 mls) PLUS 1 cup water in reserve, if needed
  3. 1/3 cup (70 mls) one of the following oils: Raw (unrefined) Cold Pressed Coconut Oil, Linseed (flaxseed) oil or Virgin/Extra Virgin Olive Oil
  4. 2-3 teaspoons freshly ground black pepper
Instructions
  1. 1) Add the turmeric and water to a pot and simmer over gentle heat for about 7-10 minutes or until you have a thick paste, stirring frequently. You may need to add more water if the mixture becomes too dry.
  2. 2) Once you have a paste, remove from the heat and set aside to cool. When the paste is just warm to the touch whisk in the oil and pepper to finish.
  3. 3) Once fully cooled store your Golden Paste in a glass jar and pop in the fridge.
Notes
  1. Golden paste will keep for 2 weeks when refrigerated, any excess can be frozen for future use.
Live Energized https://liveenergized.com/
 

The post Alkaline Recipe #210: Turmeric Golden Paste appeared first on Live Energized.

Alkaline Recipe #209: Creamy Turmeric Salad Dressing (Anti-Inflammatory)

$
0
0

This turmeric salad dressing an incredibly easy, delicious and powerfully anti-inflammatory recipe that makes practically any salad or vegetable dish more flavoursome.

The combination of the turmeric with the oils from the tahini, the coconut oil (of course) and black pepper – mean that the turmeric inside the dressing is not only super-anti-inflammatory, but is also incredibly bioavailable too. This means your body can absorb it, use it and deliver it to the site of inflammation most effectively.

I am always looking for ways to get turmeric into meals, because it’s so powerful, and having a turmeric salad dressing on hand is such a simple shortcut. You can pretty much add this to anything!

There has been a lot of press over the 1998 study: “Influence of Piperine on the Pharmacokinetics of Curcumin in Animals and Human Volunteers” that found the bioavailability of curcumin increase 2000% after consumption alongside piperine (found in black pepper).

To this end, it’s worth trying to always consume turmeric with black pepper (and other studies or theories suggest fats are important in ensuring maximum bioavailability too) where possible.

The jury is out as to whether this is truly as important as the study suggests, as there have not been further follow up studies since this was published nearly 20 years ago, but why not. A little black pepper isn’t that hard to include and is rather tasty.

Alkaline Recipe #209: Creamy Turmeric Salad Dressing (Anti-Inflammatory)

creamy turmeric dressing recipe

Ingredients

¼ cup tahini
3 tablespoons fresh lemon juice
2 tablespoons coconut oil
1 cm fresh turmeric, grated (or1 teaspoon ground turmeric – see note below)
¼ teaspoon cayenne pepper
Himalayan salt & freshly ground black pepper
Filtered water

Instructions

In a food processor, blender or whisked by hand, combine all ingredients together and blend until smooth.

Add in a little filtered water a bit at a time until it has the consistency you’d like, and season with the salt and pepper to taste.

This will keep in the fridge for up to 5 days.

Note about fresh vs powdered

I always say fresh is best, but I know this isn’t always possible. However, it’s getting surprisingly easy to source fresh turmeric these days. Even amazon sells it.

If you can’t get fresh, dried/powdered turmeric is still a great option. It’s far more anti-inflammatory than other foods. However, fresh does have a greater impact.

In this 2015 study published in the Journal of Functional Foods, the researchers found significant improvement in uptake of curcumin from fresh turmeric and greater pharmacokinetics (the movement of the substance throughout the body) in comparison to dried. (source)

The post Alkaline Recipe #209: Creamy Turmeric Salad Dressing (Anti-Inflammatory) appeared first on Live Energized.

Alkaline Diet Recipe #210: Turmeric Roasted Cauliflower & Kale Salad

$
0
0

There are a million reasons why you should eat more of the anti-inflammatory foods in this recipe. I can’t list them all – but I can tell you this: including more alkaline, antioxidant-rich, anti-inflammatory foods will not only help protect you from practically every known symptom, condition and health challenge we know of – but they will also make you feel AMAZING.

And in this quick and easy, warming and filling, simple salad I include an abundance of delicious alkaline, anti-oxidant-rich, anti-inflammatory foods.

Turmeric Roasted Cauliflower & Kale Salad

Serves 2

Ingredients

1/2 head cauliflower (washed, rinsed and dried)
5 stalks of curly kale or tuscan kale (washed and rinsed)
1 capsicum/bell pepper
1 stalk celery
1/2 avocado
2 tomatoes
1 tablespoon turmeric or 2cm fresh, grated
1/4 teaspoon cayenne pepper
1/4 teaspoon paprika
1/2 lemon
1/4 teaspoon Bragg Liquid Aminos or organic tamari
Himalayan salt & black pepper
Pumpkin seeds
Coconut oil
Olive oil

Instructions

1) Preheat the oven to 355F (180C).

2) Rip or chop the cauliflower head into floret an in a mixing bowl combine with the turmeric, cayenne pepper, paprika, salt and pepper and 2 tbsp of coconut oil and mix thoroughly.

3) Line a baking tray with baking paper and spread the cauliflower and any of the seasoning out onto the tray and put into the preheated oven in the middle shelf for 20 minutes – be sure to check regularly to make sure the cauliflower isn’t burning. If it is, move to the bottom shelf.

4) Now, chop the kale from the stems and roughly tear or chop into pieces and place in a large bowl. Mix in the lemon juice and massage with your hands for a minute. Then add the Bragg’s or tamari and place on your serving plates.

5) Thinly slice the bell pepper/capsicum, celery, chop the avocado into chunks and roughly chop the tomato. Place these on top of the kale bed. Sprinkle with pumpkin seeds and drizzle a little olive oil over this.

6) Once the cauliflower is done, remove from the oven and place on top of each salad and serve immediately.

Enjoy!
Ross

Anti Inflammation Webinar Invite

The post Alkaline Diet Recipe #210: Turmeric Roasted Cauliflower & Kale Salad appeared first on Live Energized.
Alkaline Recipe #211: Bone Builder Smoothie

$
0
0

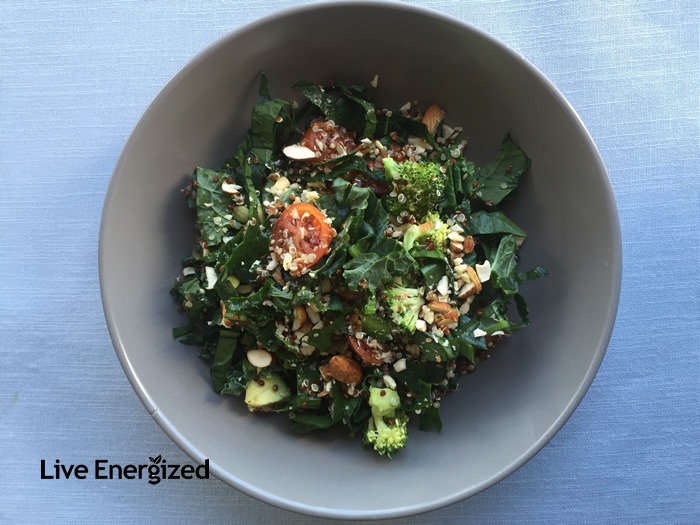
Bone-Builder Super Smoothie

An alkaline-based diet is proven to help build stronger bones and reduce the risk of osteoporosis. An acidic diet is proven to increase the risk of fractures, weaker bones and osteoporosis. This has been researched and proven beyond question.

However, are there specific nutrients and specific alkaline foods that can speed the journey and fortify our bones as quickly as possible?

Yes.

And in today’s recipe (the 211th I’ve published!) I have combined the foods with the most powerful bone building nutrients into this single smoothie. Plus, as well as all of that bone-building goodness, it’s creamy and delicious. It’s filling too!

You see, strong bones is more than just dairy (in fact, dairy has been proven to actually weaken bones). It’s a combination of nutrients, of which calcium is just one. You also need potassium, zinc, magnesium, healthy fats, phosphorous, vitamin K, antioxidants and more.

The Bone Builder Smoothie has them all, in abundance.


Enjoy:

Bone Builder Smoothie

Ingredients

1/2 Avocado
Handful Kale
1 Tbsp Pumpkin Seeds
1 Tbsp Sesame Seeds
1 Tbsp Almonds
1 Cucumber
Handful Spinach
Handful Swiss Chard/Beet Greens or other greens
250ml Almond or Coconut Milk
Coconut Water or Filtered Water (for preferred consistency)

Instructions

Blend together all ingredients until smooth, adding coconut water or filtered water at the end to get to the desired consistency.

That’s all there is to it, enjoy and if you want to check out more of my recipes, have a look at my Alkaline Recipe System by clicking on the image below!

Ross

get the alkaline recipe book here

The post Alkaline Recipe #211: Bone Builder Smoothie appeared first on Live Energized.

Viewing all 84 articles
Browse latest View live